Saturday, September 10, 2011
Monday, September 5, 2011
100% Silk Purple Pumpkin
 I just got done making this beautiful 100% silk fabric pumpkin. Isn't it cute? It is now for sale in my etsy shop!
 If you would like a pumpkin in a different color and fabric, feel free to let me know and I will be happy to make it for you!
DIY Upcycle a Pillow and make a Cover for it!
I got new pillows for my bed, yet I didn't have the heart to throw out good, old pillows...
This is a simple and easy tutorial to upcycle a pillow into new glory.
PS its the one with lace on the end of it on the left:)
Step one get a pillow.
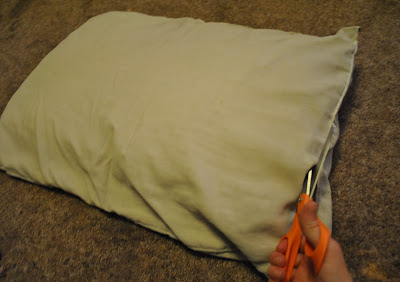
Step two-cut an opening in the side of the pillow.
Step 3- cut your pillow in half and put one half back in the pillow case.
Step 4- sew your pillow case shut, next to the pillow (ps this is harder than it looks but is possible!). Step 5- cut some fabric-
- Cut 1 of 13.5" x17"-Linen
- Cut 2 of 9.25" x17"-Linen
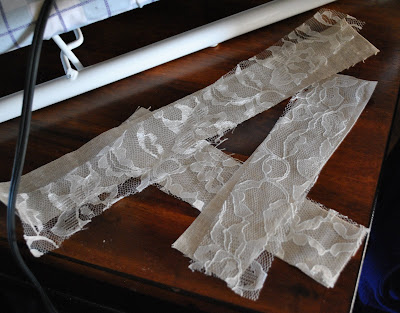
- Cut 2 of 2" x17" --Lace AND Linen (1 of each)
- Cut 4 of 2" x9.25" --Lace AND Linen (2 of each)
Step 7- Sew your lace and linen strips to each of your 3 linen pieces.
Step 8- Iron the seams flat towards the linen and lace 2 inch sides.
Step 9- Along the tops of your pieces (excluding the front piece), you will (1) fold over and press a quarter inch, (2) fold over and press another quarter inch, and (3) top stitch along the fold to make a finished edge.
Step 10- Put all your pieces together, right sides facing each other, and sew a quarter inch all around.
Step 11- your finished product should look like this:
Step 12- turn inside out and put your half of a pillow, pillow, into your cover. and tada! your finished!
I used this tutorial over at Cottage Magpie to help me along. :)
Sunday, September 4, 2011
Same Idea, Yet Better: Curtains
Ok, so about a month ago, I was completely obsessed with these curtain panels from Ballard Designs. Therein lies the problem, they were $179.00 - $229.00 PER PANEL! ...yea right, i said to myself, I can make them for way cheaper and maybe even better! These are burlap and crewel work, but I decided to go with linen since I liked the look better, and a stencil with white fabric paint!
I could not, for the life of me, find a stencil big enough or that I liked, so I bought a "make your own stencil" kit from Michaels, and printed off a design I liked the best, then traced the design onto my stencil, cut it out, and started painting...:) I only sewed the top where the rod will go through because i kind of liked the ragged look.
Here are the results! Whaddya think? I personally love them and they only cost me around $80 for the fabric, paint, and stencil! I like them SO much better, yet they still have that certain quality i liked in the Ballard ones.
Have a Happy Labor Day Weekend:)
Saturday, September 3, 2011
DIY: How To Make A Fabric Pumpkin
After seeing all the beautiful fabric pumpkins on Etsy.com, I decided that it was about time I made my own:) (I made 2 others before this, so I had practice by the time I made this). The day started out fine, I found a roll of fabric in the back of Value Village for $0.99...great price for this pumpkin if you ask me!
The stem and leaves were made of an old wool scarf that my brother used to own....
I then cut the roll of fabric into 15" strips. The final fabric piece that you will be working with will be equal in width and length when folded in half-for instance this will be 15"x15."
Then I sewed all the pieces together length-wise and made sure that the dimensions were correct and cut off any stray pieces to make the final piece even all 'round.
I then sewed the two ends together so that all the long sides of the fabric were sewn together forming almost a cylinder.
After the fabric was all sewn together, I toon some twine (you can use any rope or yarn you want, just make sure that it will hold when pulled tight) and a big needle (you will be pricked...).
Once the twine is threaded into the needle, make a quick stitch through one of the ends of the fabric.
Then, pull as tight as you can and tie in a double knot.
Once you have done that, flip it inside out and stuff! Make sure that you stuff till you can't stuff anymore, then add some on top. You don't want a sad looking, deflated pumpkin...lol
Then take some more twine and stitch through the top of the pumpkin.
Once again, pull as tight as you can and knot it. It will look like this:
Tie another LONG piece of twine onto the previous string (make sure it will stay when pulled tight). DO NOT CUT EITHER STRING OFF! (this will be important later).
Then, take your threaded needle with the long string, and pull it through the OTHER end so it goes around the pumpkin.
Pull the string up through the top and pull hard, you want the definition of a pumpkin.
Continue to go around the pumpkin with the string in this manner, and remember to pull tight. Once you get to the end and you have gone around the pumpkin with the string as many times as you want to, tie the string to the first string you had there, into a knot.
Then sew on your stem and leaves with the remaining twine. You can make them out of any material you like. Here I am cutting the leaves.
Subscribe to:
Comments (Atom)


